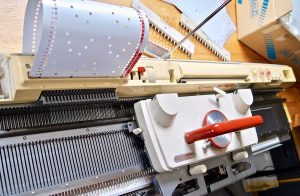
Knitting machines need love!https://youtu.be/jOEQHbPcVNE?si=MPrhEzpkMpnimgvz
I am often asked about how I keep my knitting machines clean. Well, when you have as many knitting machines as I do (22 at the last count), you have to have a strategy for keeping them all in great working condition!
First things first
Firstly, let’s look at where you store your machines. Is it free from damp? Is it dry? Is the place where you keep your machines roughly room temperature? If your answer is “no” to any of these questions, then you may need to rethink where you store your machines.
Check those needles
Next, you need to check the needle retaining bar. This is located in the needle bed itself, so you will need to get it out to have a proper look at it to view its condition. Look in your knitting machine’s manual to see how to remove yours from the needle bed. If the sponge is flat, is pulling away or generally looks in poor condition, then you need to replace either the whole bar or remove the old sponge strip & old glue before you replace it. There are various companies online that will be able to send you a replacement. Not all needle retaining bars are born equal, so you will need to know the make & model of the machine you have. Not all machines work using a sponge bar, but it is safe to say that most Japanese knitting machines work with the same system.
Before you start any new project, do inspect the needles in the needle bed. Are there any stiff latches? Are any needles bent? Are any needles rusty & do not run smoothly? If you are answering “yes” to any of these questions, then you will need to replace the needles before you put the needle retaining bar back into the machine.
Keep it Clean
Before starting any new project, it is advisable to wipe off any old oil, black grease & dust from the needle bed & underside of the knitting machine carriage. Do this with a soft cloth which doesn’t shed fibres & the cleaning brush which came in your knitting machine’s tool kit. Apply new oil (only use the oil that came with your machine) to a soft cloth & wipe down all needles, machine bed rails & the cams underneath the carriage.
Check that the knitting carriage is seated on the needle bed correctly (you shouldn’t be able to lift off the carriage from the needle bed when the sinker plate is in position & the whole carriage should move smoothly over the needle bed with needles in normal working position.
Whilst you are looking at the carriage, check all the cogs & wheels on the sinker plate are running smoothly. Is there yarn fluff wrapped around the brushes or cogs? Are there any stiff wheels? Or is anything bent? If the answer is “yes” to any of these questions, then you will need to clean off all yarn debris from the wheels & in extreme cases you will need to unscrew the wheels from the plate, remove any yarn, etc., & then reassemble them in position for a final check. All wheels & cogs need to spin freely when spun.
Tension Issues
Finally, check the tension mast’s tensioner (it works a bit like the tension on a sewing machine). Check this for fluff & any other yarn debris. Also, check that the spring inside the unit is putting some tension on the yarn going through it. You can adjust it depending on the yarn you are using. Generally speaking, you should put more pressure on (or a larger number) thinner yarns & less tension (or a smaller number) for thicker yarns.
Now it’s time
After tending to any issues outlined above, you should be able to start your next knitting project.
Good luck & have fun!
Claire Newberry. Copyright Claire Newberry, 2025.
